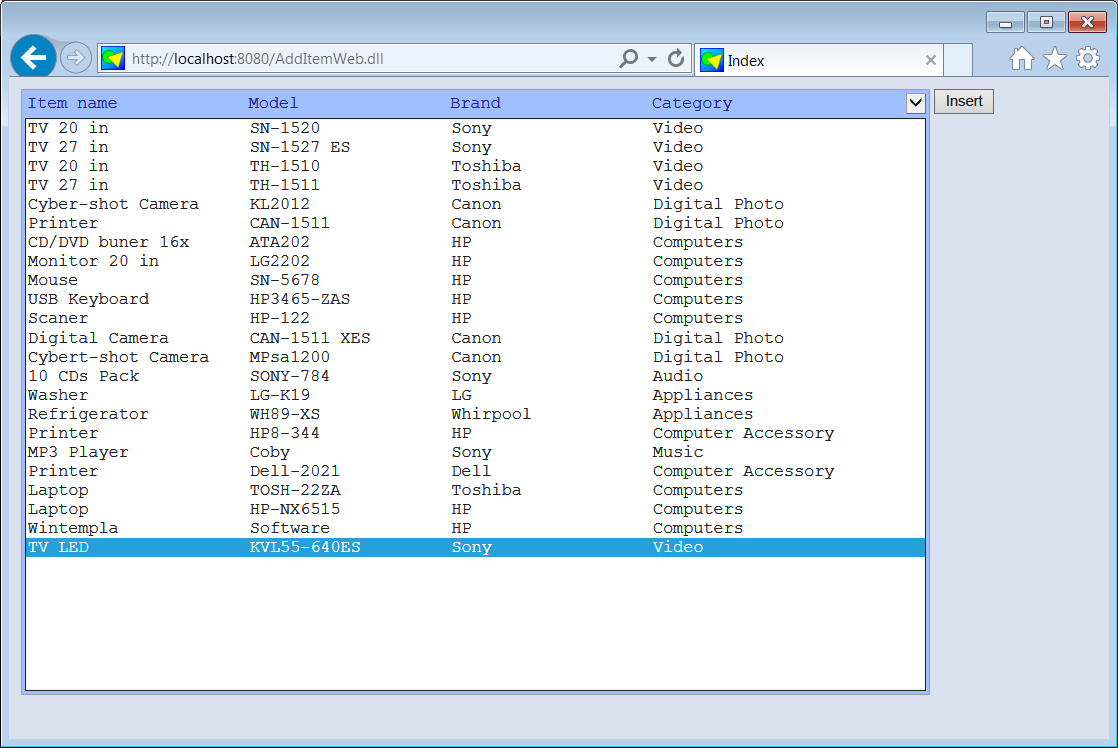
 Browser View to review the appearance of the web page.
Inserting |
To insert an item:
|
| Tip |
| A project by default has one main interface; when the user inserts a new element another GUI must open to collect the respective information. This additional interface is called Dialog or Form. To add a new dialog, review from this tutorial the section: Wintempla > Dialogs. |
| Problem 1 |
| Create a project called AddItem to add an item using a Wintempla Dialog Application. |
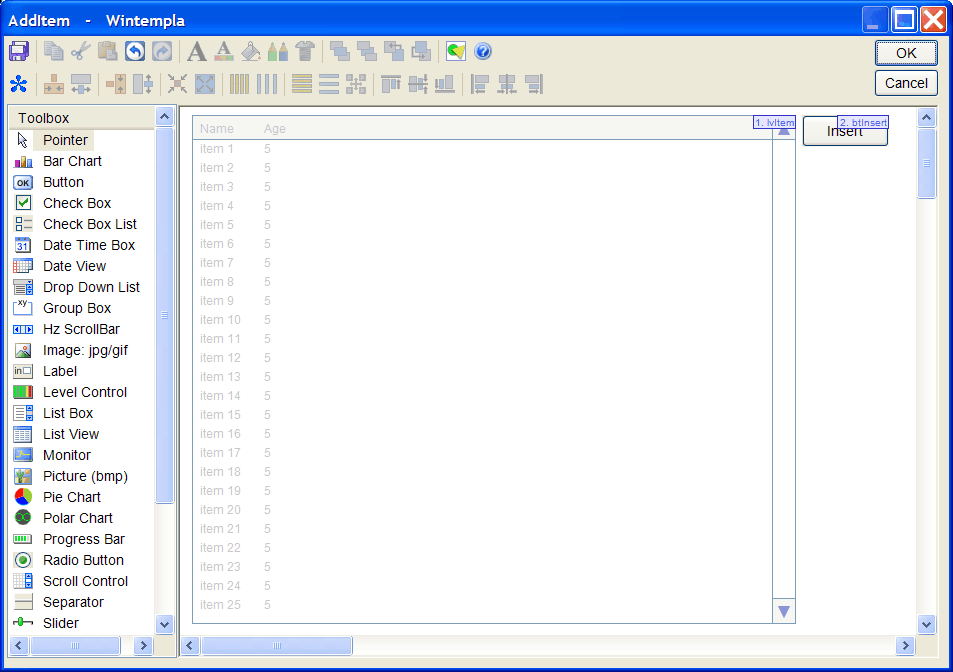
| Step A |
| Drag and drop a list view control and a button as shown. |
| Step B |
| Edit the AddItem.h file as shown. |
| AddItem.h |
| #pragma once //______________________________________ AddItem.h #include "resource.h" class AddItem: public Win::Dialog { public: AddItem() { } ~AddItem() { } void FillListView(); protected: ... }; |
| Step C |
| Edit the AddItem.cpp file as shown. |
| AddItem.cpp |
| ... void AddItem::Window_Open(Win::Event& e) { //________________________________________________ 1. lvItem: Column Setup lvItem.Cols.Add(0, LVCFMT_LEFT, 200, L"Item name"); lvItem.Cols.Add(1, LVCFMT_LEFT, 120, L"Model"); lvItem.Cols.Add(2, LVCFMT_LEFT, 120, L"Brand"); lvItem.Cols.Add(3, LVCFMT_LEFT, 120, L"Category"); //_______________________________________________ 2. Fill the list view control with the items FillListView(); } void AddItem::FillListView() { } void AddItem::btInsert_Click(Win::Event& e) { } |
| Step D |
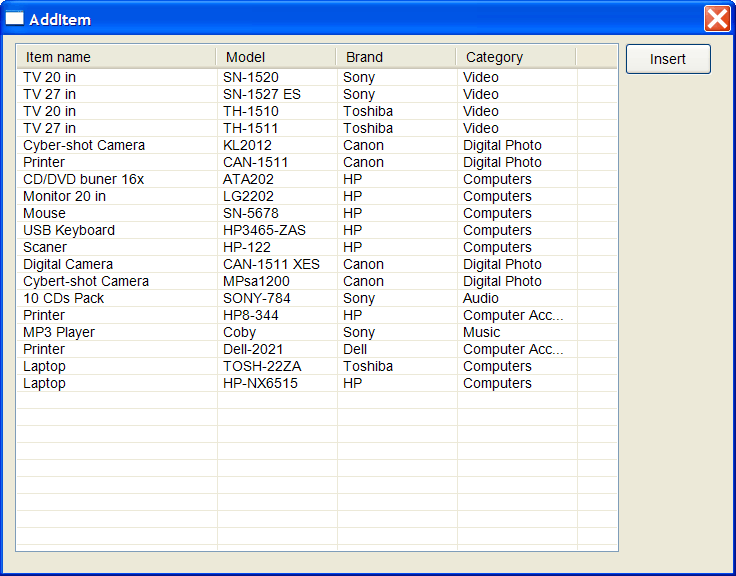
| Complete the function FillListView to fill the list view control with the items from the best_buy database. Do not forget to include the primary key in your SQL command. |
| Step E |
| Add a new Dialog called ItemDlg Tools > Add Wintempla Item... > Dialog (this will create the files ItemDlg.h and ItemDlg.cpp). In previous versions of Wintempla use: Project > Add New item... > Wintempla Dialog . |
| Step F |
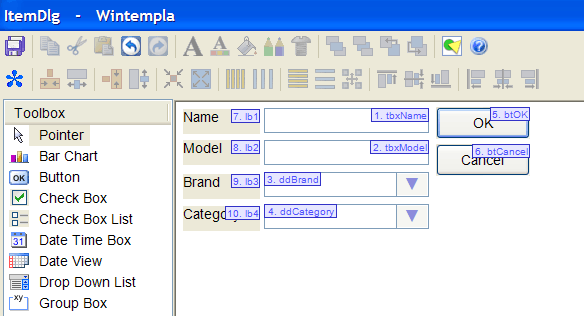
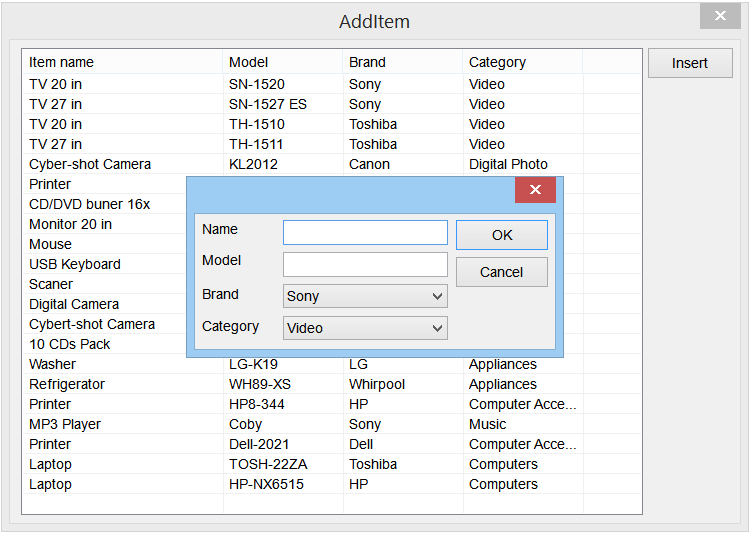
| Edit the ItemDlg interface using Wintempla as shown below. Check the order of the control is as shown and set the property of Default Button to the OK button. Edit and complete the ItemDlg.cpp file as shown. |
| ItemDlg.cpp |
| #include "stdafx.h" //_____________________________________________ ItemDlg.cpp #include "ItemDlg.h" void ItemDlg::Window_Open(Win::Event& e) { this->Text = L"Item"; //________________________________________________ 1. Fill the category drop down list and the brand drop down list Sql::SqlConnection conn; try { //conn.OpenSession(DSN, USERNAME, PASSWORD); //Control Panel>Administrative Tools>Data Sources (ODBC)>Create dsn_myDatabase conn.OpenSession(hWnd, CONNECTION_STRING); ... //_______________________________________________ 2. Select default values ddCategory.SelectedIndex = 0; ddBrand.SelectedIndex = 0; } void ItemDlg::btOK_Click(Win::Event& e) { } void ItemDlg::btCancel_Click(Win::Event& e) { } |
| Step H |
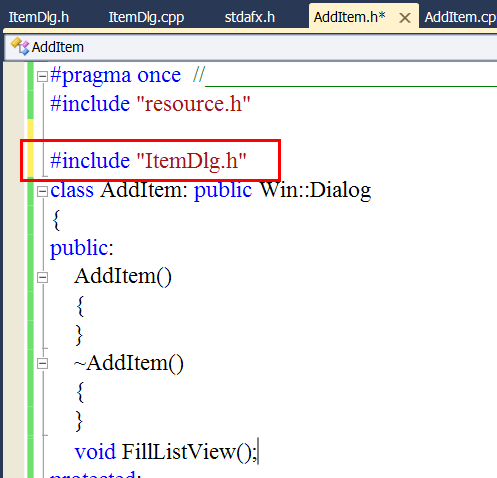
| Include the ItemDlg.h at the top of the AddItem.h file as shown below. |
| Step I |
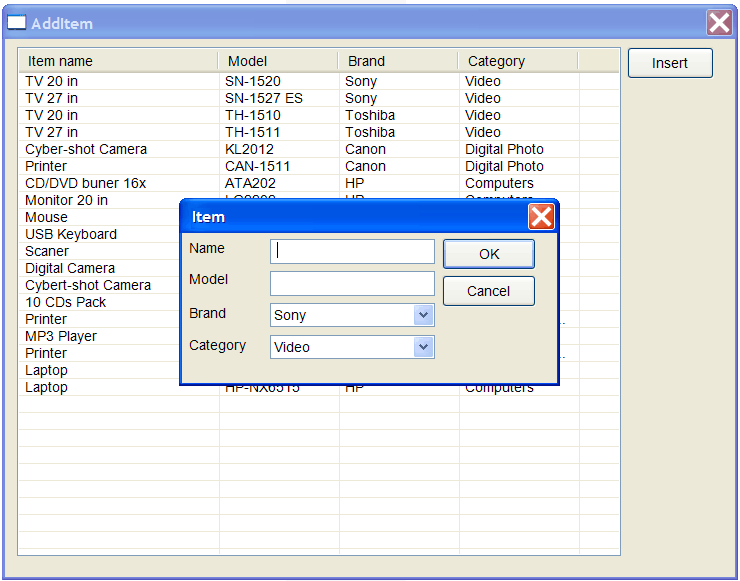
| Edit the AddItem.cpp file as shown. You should be able to open the ItemDlg dialog by pressing the Insert button. |
| AddItem.cpp |
| ... same as before void AddItem::btInsert_Click(Win::Event& e) { ItemDlg dlg; dlg.BeginDialog(hWnd); FillListView(); } |
| Step J |
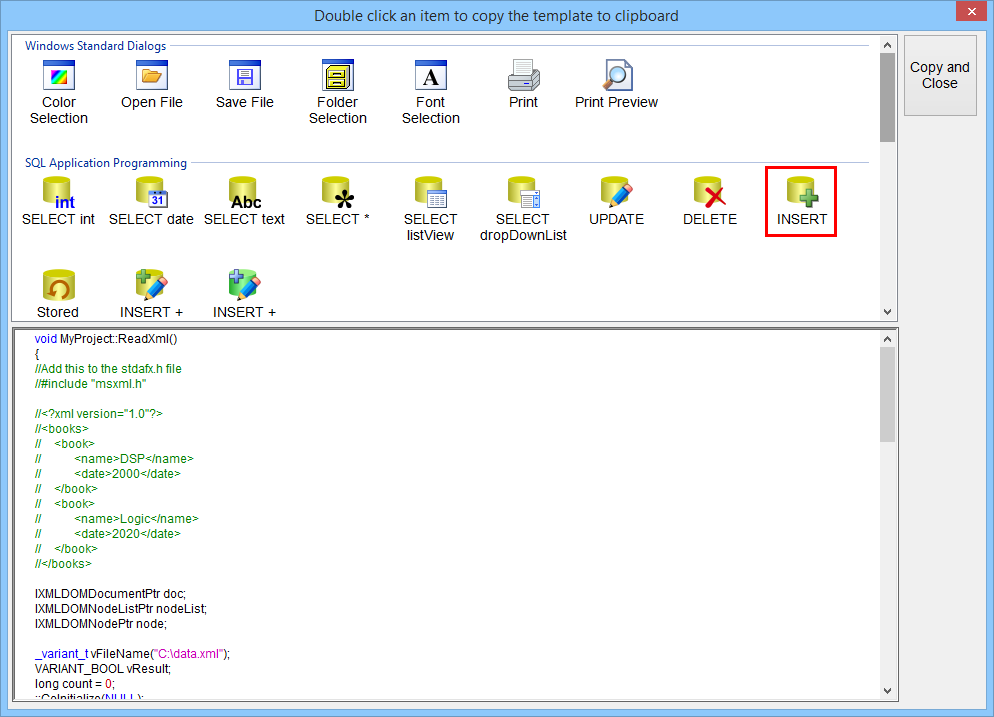
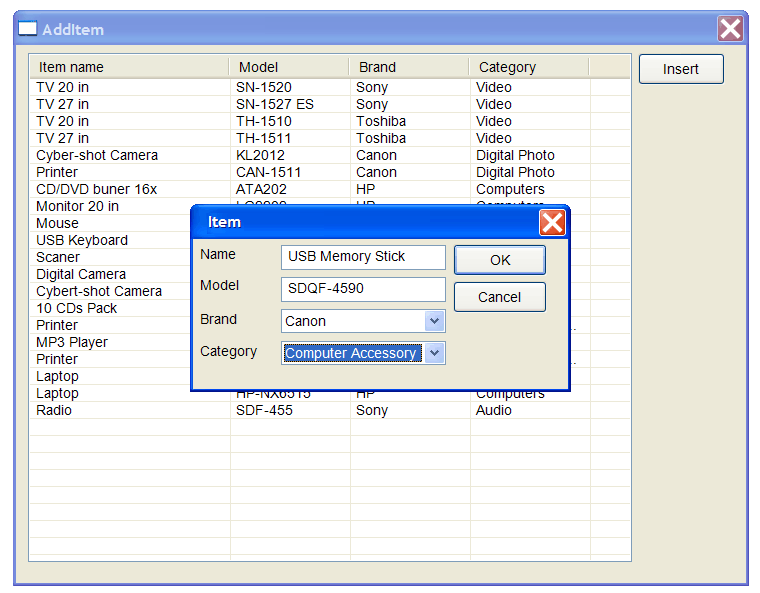
| From Microsoft Visual Studio menu, copy and paste an SQL Insert Template: Tools > Add Wintempla Item... > Clipboard Code . Then, edit the ItemDlg.cpp file as shown. |
| ItemDlg.cpp |
| #include "stdafx.h" //_____________________________________________ ItemDlg.cpp #include "ItemDlg.h" void ItemDlg::Window_Open(Win::Event& e) { ... same as before //_______________________________________________ Select default values ddCategory.SelectedIndex = 0; ddBrand.SelectedIndex = 0; } void ItemDlg::btOK_Click(Win::Event& e) { //__________________________________________________________ 1. Get category_id LPARAM category_id; if (ddCategory.GetSelectedData(category_id) == false) return; //__________________________________________________________ 2. Get brand_id LPARAM brand_id; if (ddBrand.GetSelectedData(brand_id) == false) return; //__________________________________________________________ 3. Get Name and Model wstring name = tbxName.Text; wstring model = tbxModel.Text; //__________________________________________________________ 4. Validate (you may use regular expressions) if (name.length() <= 2) { tbxName.ShowBalloonTip(L"Item Name", L"The item name must contain at least three characters", TTI_ERROR); return; } if (model.length() <= 2) { tbxModel.ShowBalloonTip(L"Item Model", L"The item model must contain at least three characters", TTI_ERROR); return; } //__________________________________________________________ 5. Create INSERT statement wstring cmd; Sys::Format(cmd, L"INSERT INTO item (descr, model, brand_id, category_id) VALUES('%s', '%s', %d, %d)", name.c_str(), model.c_str(), brand_id, category_id); //__________________________________________________________ 6. Execute INSERT Sql::SqlConnection conn; int rows = 0; try { //conn.OpenSession(DSN, USERNAME, PASSWORD); //Control Panel>Administrative Tools>Data Sources (ODBC)>Create dsn_myDatabase conn.OpenSession(hWnd, CONNECTION_STRING); rows = conn.ExecuteNonQuery(cmd); if (rows!=1) { this->MessageBox(Sys::Convert::ToString(rows), L"Error - inserted rows", MB_OK | MB_ICONERROR); } this->EndDialog(TRUE); } catch (Sql::SqlException e) { this->MessageBox(e.GetDescription(), L"Error", MB_OK | MB_ICONERROR); } } void ItemDlg::btCancel_Click(Win::Event& e) { this->EndDialog(FALSE); } |
Web Submit Button |
In a Web application there are two types of buttons:
|
NavigateTo |
| In a Wintempla web application, it is possible to navigate from one page to another one using the command h.NavigateTo(L"PageName"). |
| Problem 2 |
| Create a project called AddItemWeb to add an item using a Wintempla Web Application. Publish the web application to a web server using Anonymous Access. |
| Step A |
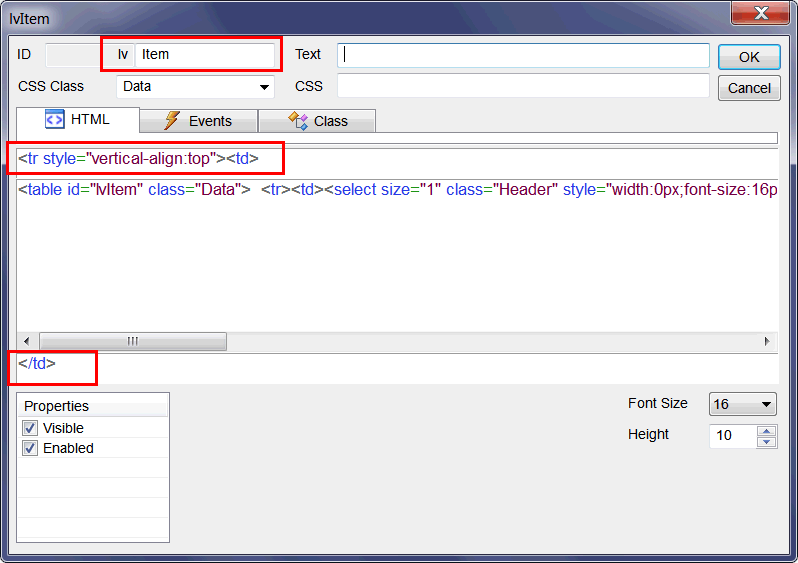
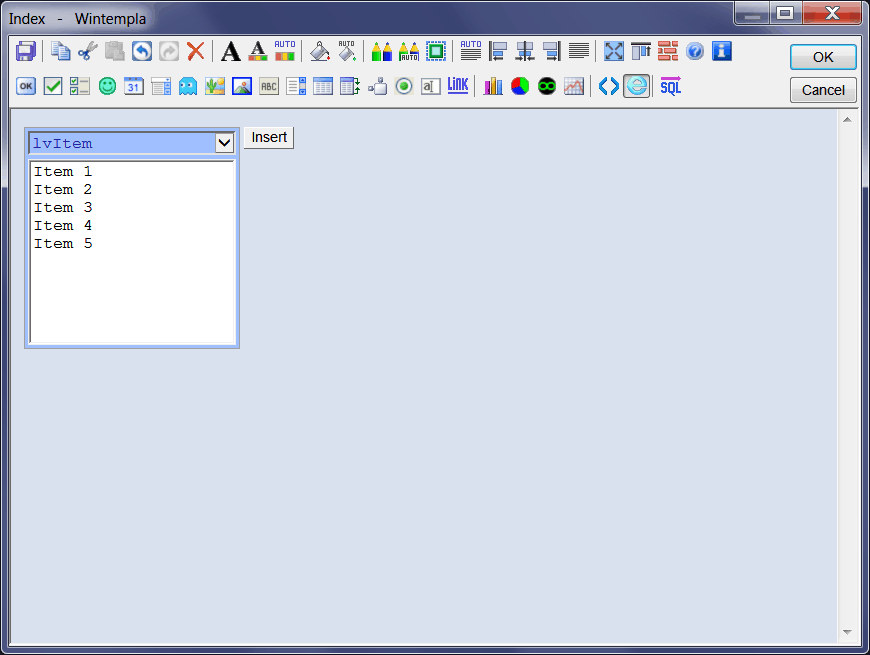
| Add a list view control as shown. |
| Step B |
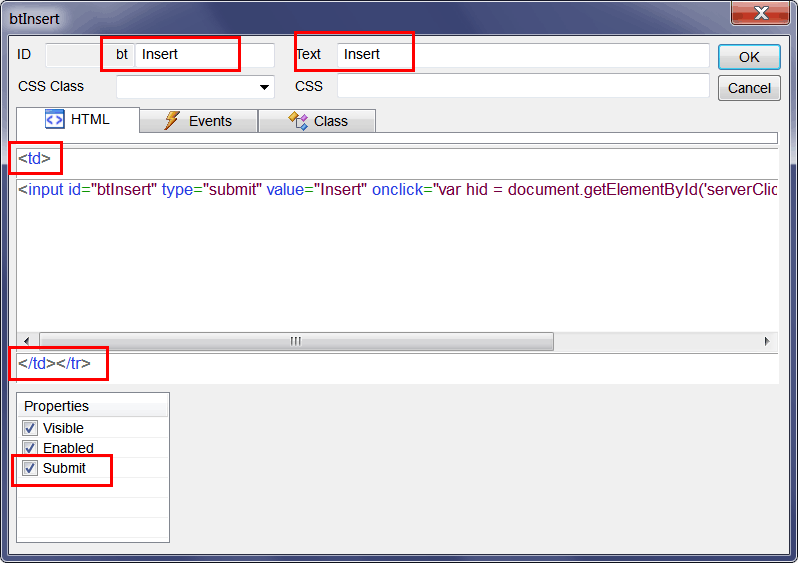
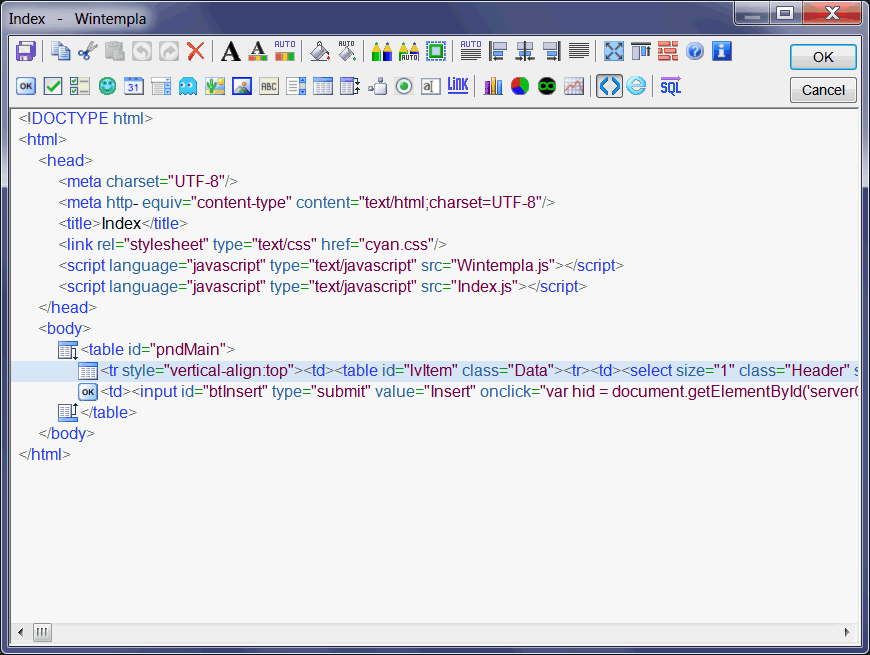
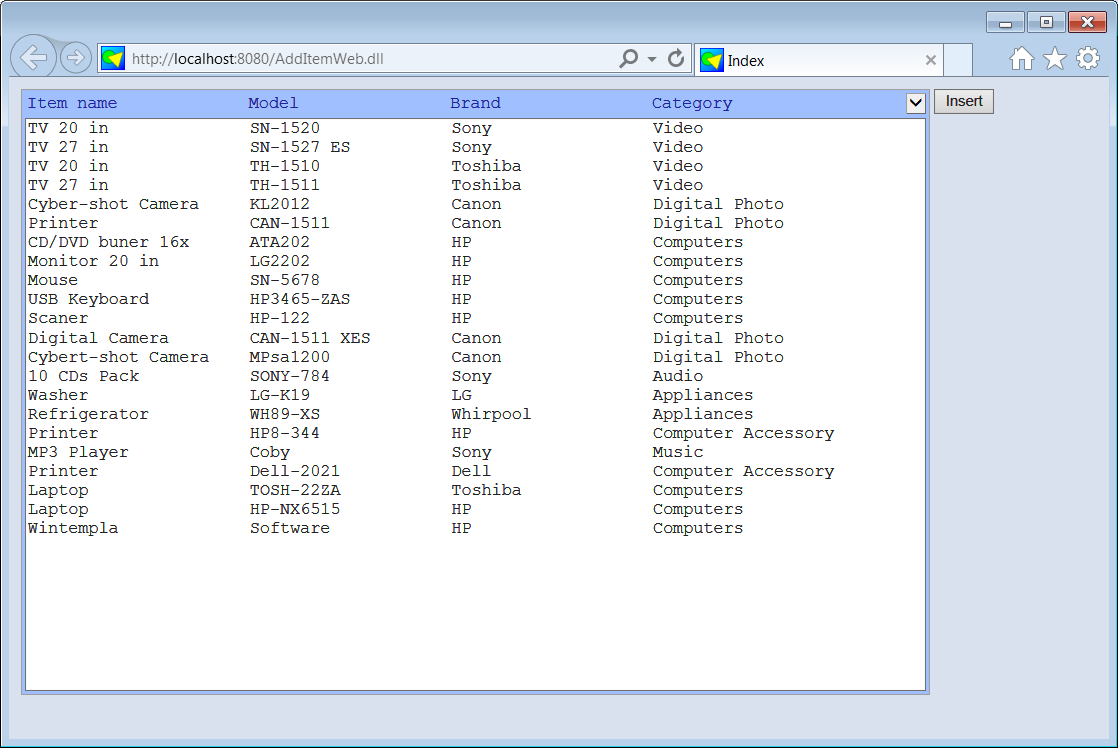
Add a Submit button as shown (It must be a Submit button because, when the user clicks the button, the web application must navigate to a different web page). Then use the Browser View to review the appearance of the web page. Browser View to review the appearance of the web page. |
| Step C |
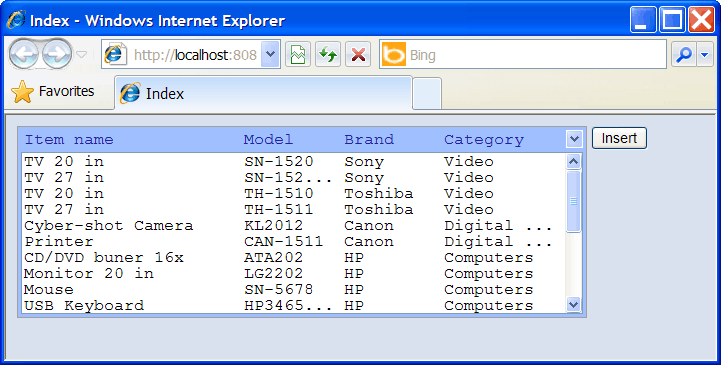
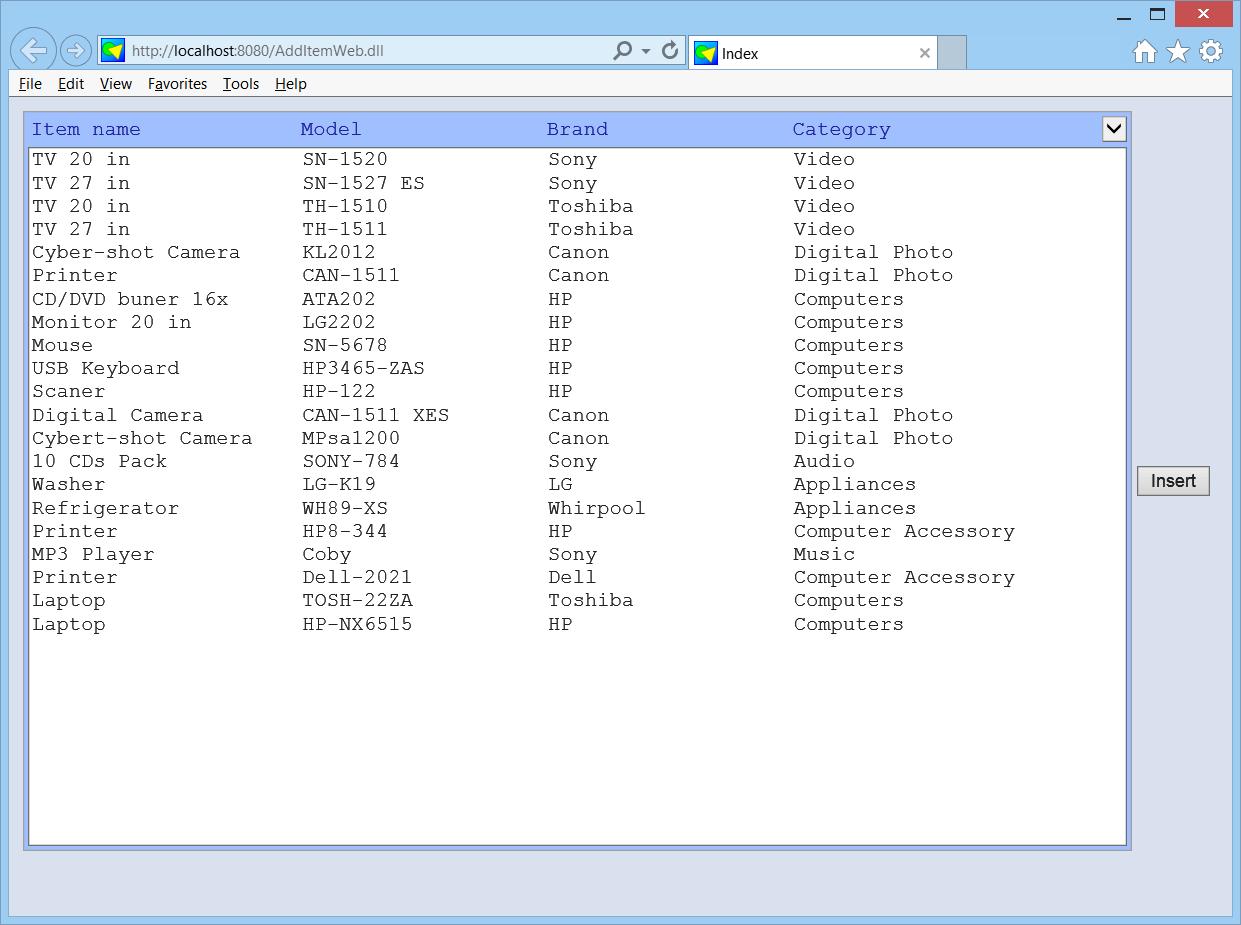
| Edit the file Index.cpp by completing the function Window_Open to fill the list view control. After completing the code, run the program to see the list of items in the list view control. |
| Index.cpp |
| #include "stdafx.h" //_____________________________________________ Index.cpp #include "Index.h" void Index::Window_Open(Web::HttpConnector& h) { //________________________________________________ 1. lvItem: Column Setup ... lvItem.Height = 30; //_______________________________________________ 2. Fill the list view control with the items Sql::SqlConnection conn; try { ... } catch (Sql::SqlException e) ... } void Index::btInsert_onclick(Web::HttpConnector& h) { } |
| Step D |
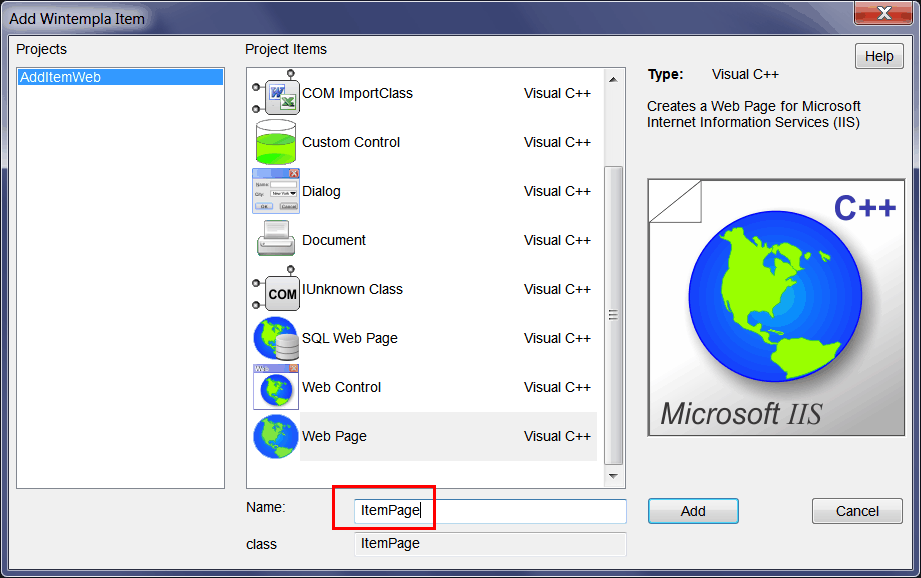
| Insert a web page called ItemPage Tools > Add Wintempla item... > Web Page. In previous versions of Wintempla use: Project > Add New item... . After this your web site has two pages: Index and ItemPage. |
| Step E |
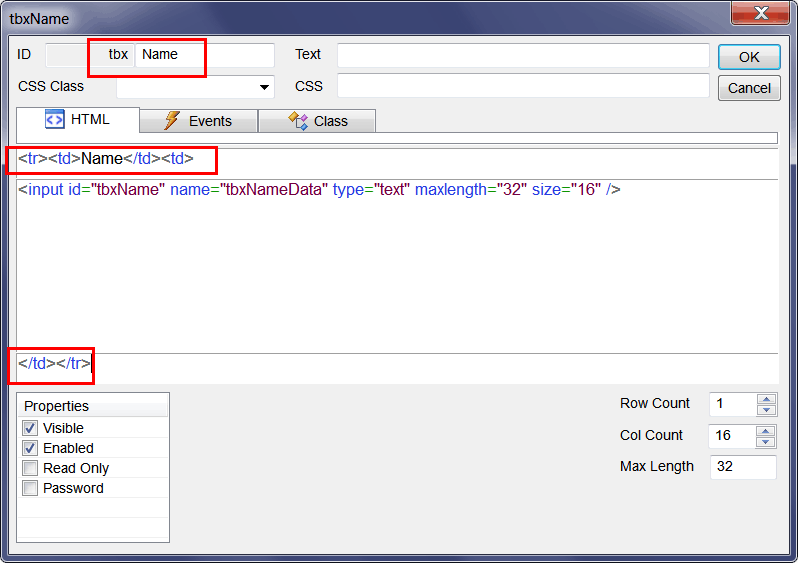
| Insert one Parent Node. Then, Insert one textbox for the name as shown. We will use a table to layout the web controls; the table will have four rows and two columns. |
| Step F |
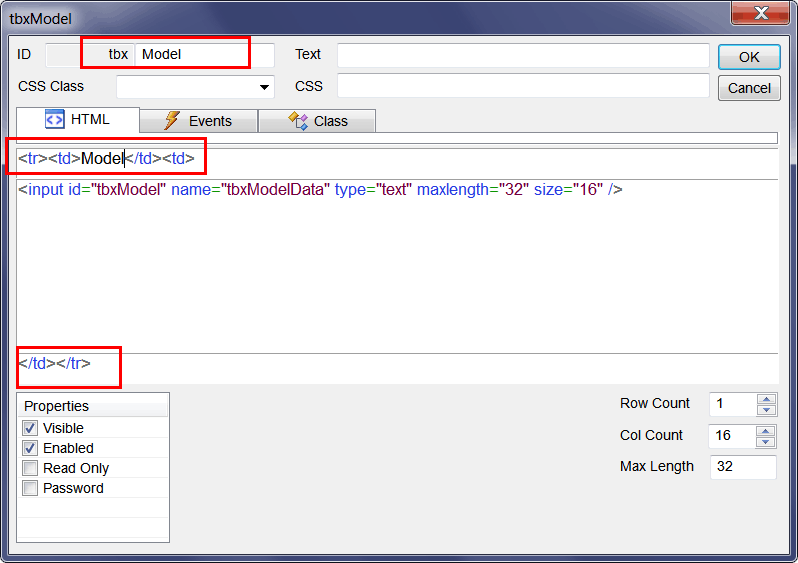
| Insert one textbox for the model as shown. |
| Step G |
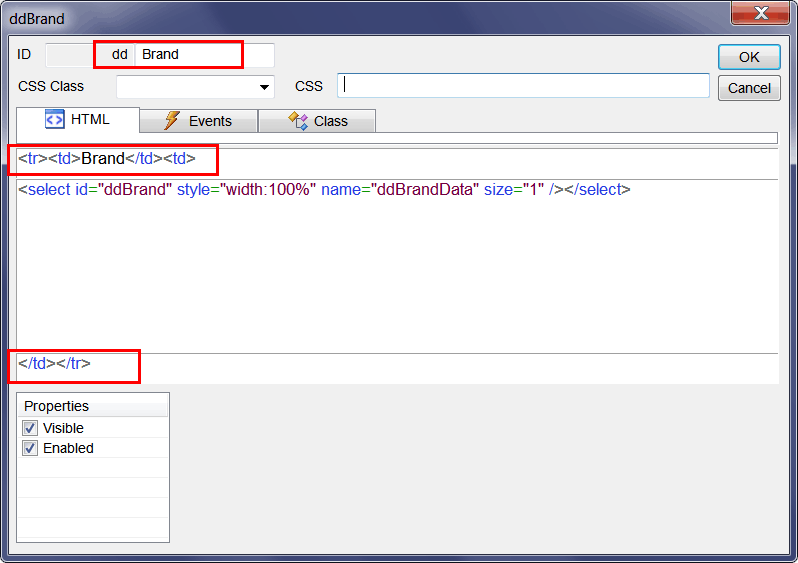
| Insert a drop down list for the brand as shown. |
| Step H |
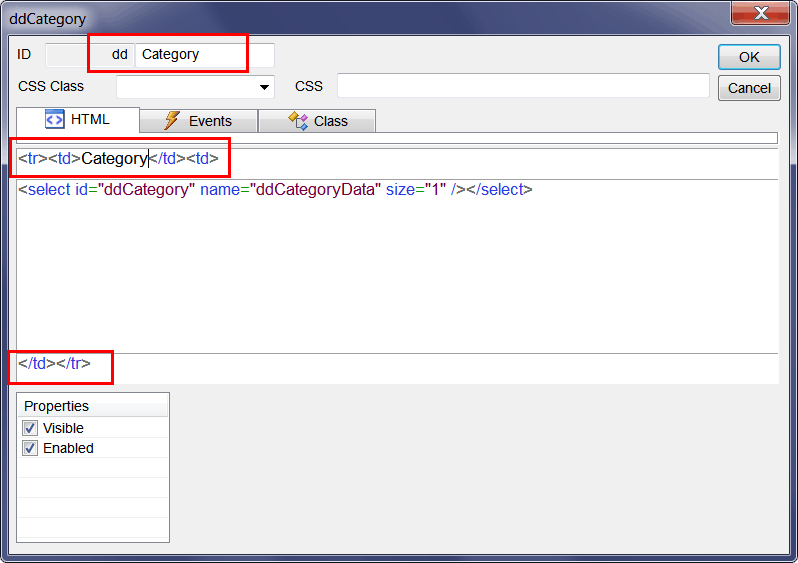
| Insert a drop down list for the category as shown. |
| Step I |
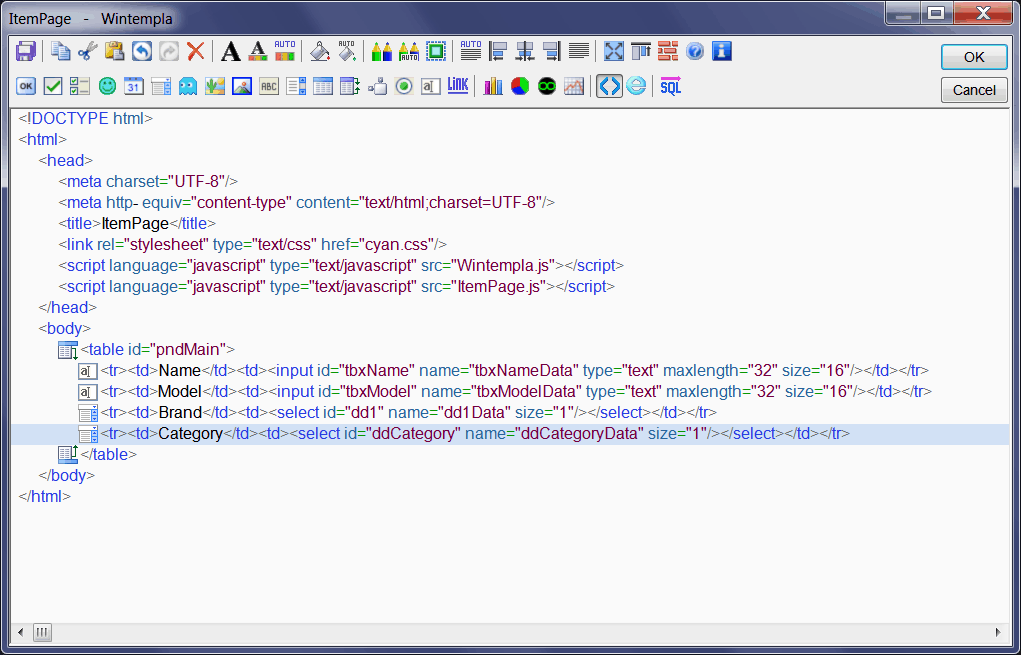
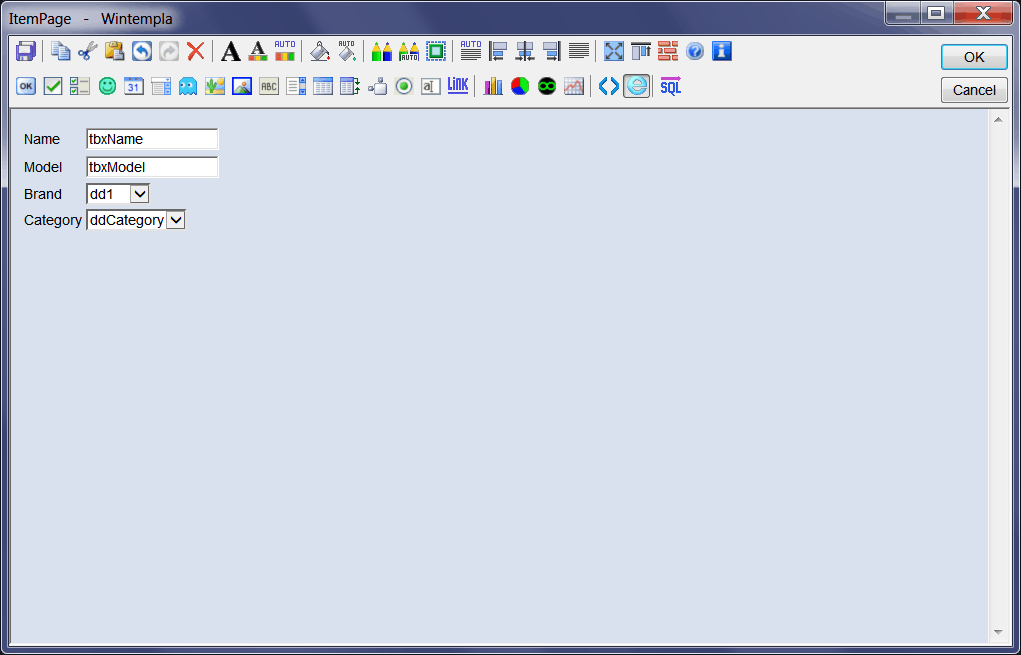
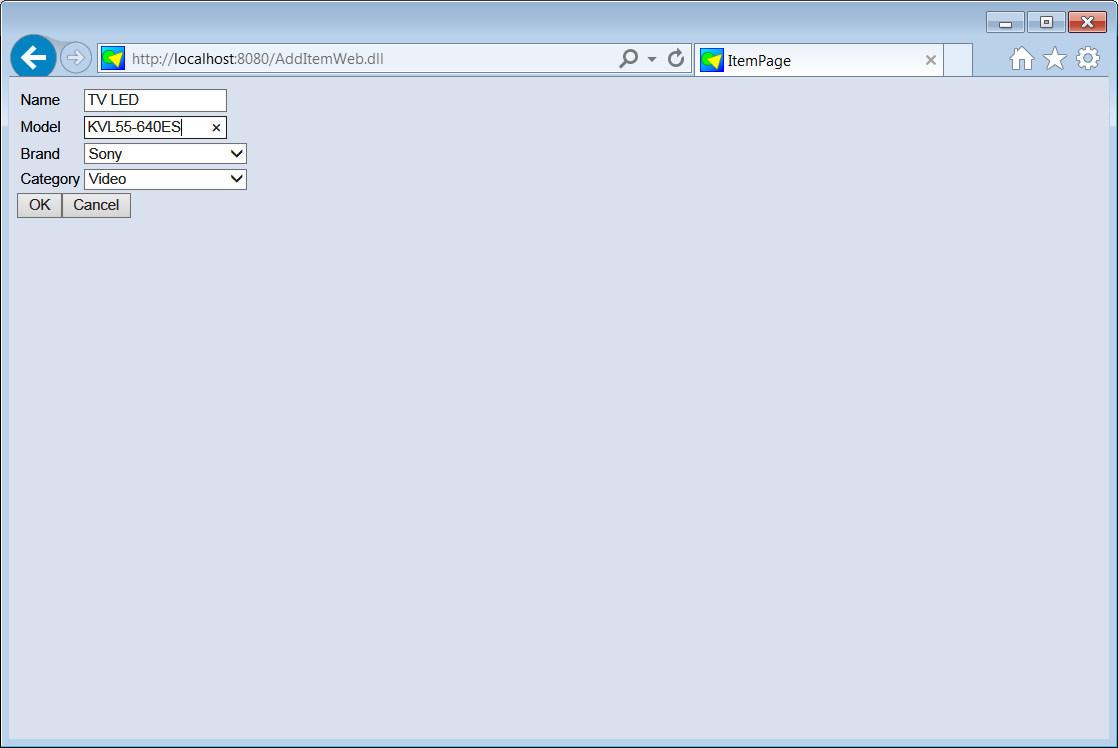
| After completing the table with the four controls, the HTML view and Browser View should be as shown below. |
| Step J |
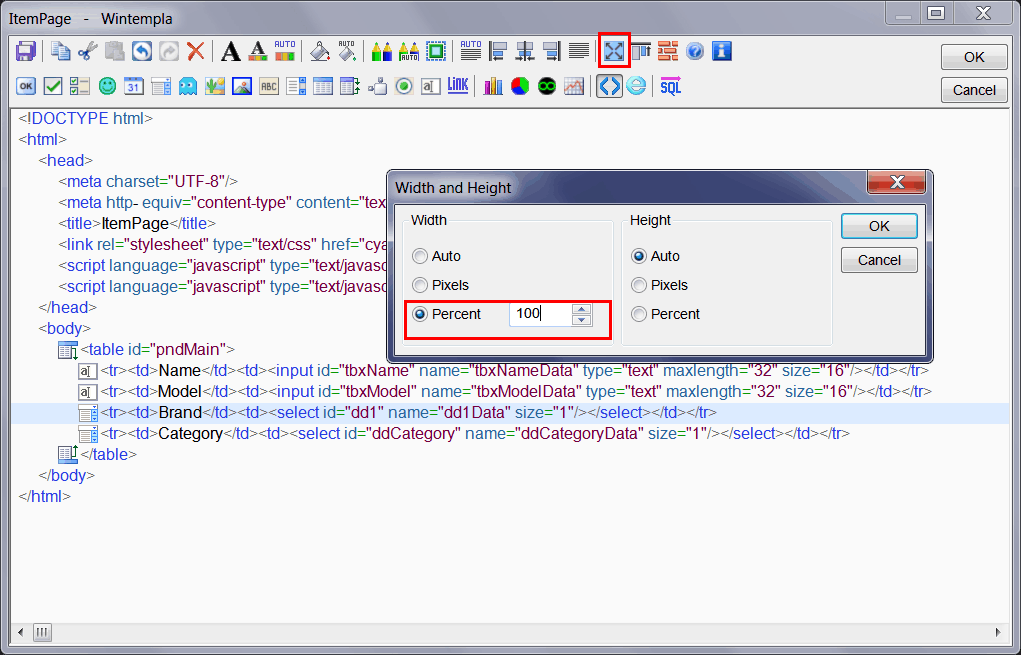
| From the HTML view, select the brand drop down list from the list view control in the left, and set the width to 100%. You may change the width of the other controls to 100%. |
| Step K |
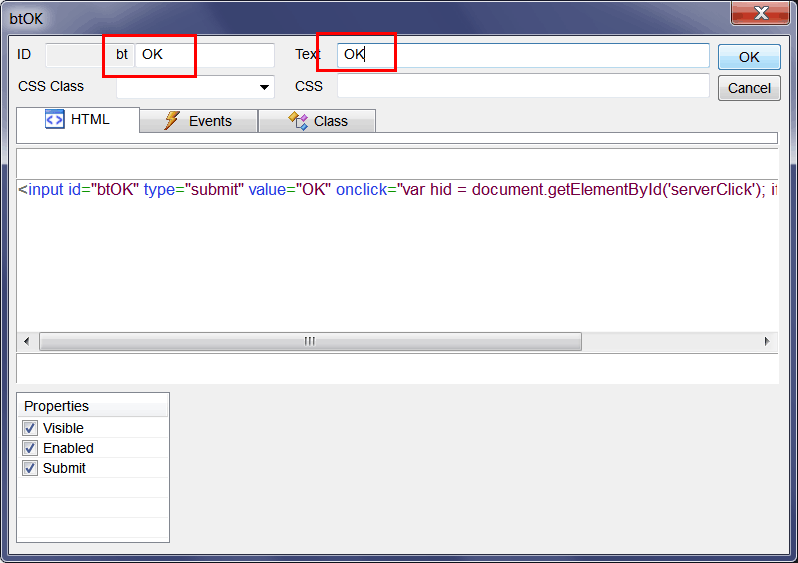
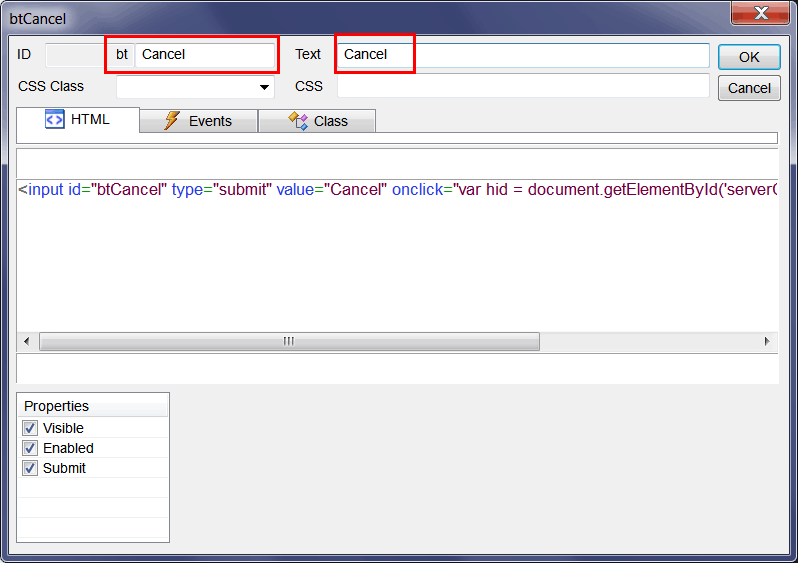
| Insert two Submit buttons after the main table: an OK button and a Cancel button as shown below. |
| Step L |
| Edit the AddItemWeb.cpp file to include the ItemPage.h file as shown below. |

| Step M |
| Edit the Index.cpp file as shown. |
| Index.cpp |
| ... same as before void Index::btInsert_Click(Web::HttpConnector& h) { h.NavigateTo(L"ItemPage"); } |
| Step N |
| Edit the ItemPage.cpp file as shown |
| ItemPage.cpp |
| ... void ItemPage::Window_Open(Web::HttpConnector& h) { //________________________________________________ 1. Fill the category drop down list and the brand drop down list Sql::SqlConnection conn; try { //conn.OpenSession(DSN, USERNAME, PASSWORD); //Control Panel>Administrative Tools>Data Sources (ODBC)>Create dsn_myDatabase conn.OpenSession(NULL, CONNECTION_STRING); conn.ExecuteSelect(L"SELECT category_id, descr FROM category", 100, ddCategory); conn.ExecuteSelect(L"SELECT brand_id, descr FROM brand", 100, ddBrand); } catch (Sql::SqlException e) { this->MessageBox(e.GetDescription(), L"Error", MB_OK | MB_ICONERROR); } if (h.FirstTime == true) { //_______________________________________________ 2. Select default values ddCategory.SelectedIndex = 0; ddBrand.SelectedIndex = 0; } } void ItemPage::btOK_onclick(Web::HttpConnector& h) { //__________________________________________________________ 1. Get category_id LPARAM category_id; if (ddCategory.GetSelectedData(category_id) == false) return; //__________________________________________________________ 2. Get brand_id LPARAM brand_id; if (ddBrand.GetSelectedData(brand_id) == false) return; //__________________________________________________________ 3. Get Name and Model wstring name = tbxName.Text; wstring model = tbxModel.Text; //__________________________________________________________ 4. Validate (you may use regular expressions) if (name.length() <= 2) { tbxName.ShowBalloonTip(L"Item Name", L"The item name must contain at least three characters", TTI_ERROR); return; } if (model.length() <= 2) { tbxModel.ShowBalloonTip(L"Item Model", L"The item model must contain at least three characters", TTI_ERROR); return; } //__________________________________________________________ 5. Create INSERT statement wstring cmd; Sys::Format(cmd, L"INSERT INTO item (descr, model, brand_id, category_id) VALUES('%s', '%s', %d, %d)", name.c_str(), model.c_str(), brand_id, category_id); //__________________________________________________________ 6. Execute INSERT Sql::SqlConnection conn; int rows = 0; try { //conn.OpenSession(DSN, USERNAME, PASSWORD); //Control Panel>Administrative Tools>Data Sources (ODBC)>Create dsn_myDatabase conn.OpenSession(NULL, CONNECTION_STRING); rows = conn.ExecuteNonQuery(cmd); if (rows != 1) { this->MessageBox(Sys::Convert::ToString(rows), L"Error - inserted rows", MB_OK | MB_ICONERROR); } h.NavigateTo(L"Index"); } catch (Sql::SqlException e) { this->MessageBox(e.GetDescription(), L"Error", MB_OK | MB_ICONERROR); } } void ItemPage::btCancel_onclick(Web::HttpConnector& h) { h.NavigateTo(L"Index"); } |
| Problem 3 |
| Create a project called AddItemS to add an item using a Windows Form application in C#. To show the AddItem form (dialog) use the following code: |
| AddItemS.cs |
| ... AddItemForm addItemForm = new AddItemForm(); addItemForm.ShowDialog(); |
| AddItemForm.cs |
| ... { SqlConnection conn = new SqlConnection("some connection string"); try { String cmd = "INSERT INTO item (descr, model, brand_id, category_id) VALUES('"; cmd += tbxDescr.Text; cmd += ", '"; cmd += tbxModel.Text; ... conn.Open(); sql = new SqlCommand(cmd, conn); int result = sql.ExecuteNonQuery(); if (result == 1) { } else { } } catch (SqlException ex) { error.Append("Error ExecuteNonQuery", cmd, ex.Message); } finally { conn.Close(); } } |
| Problem 4 |
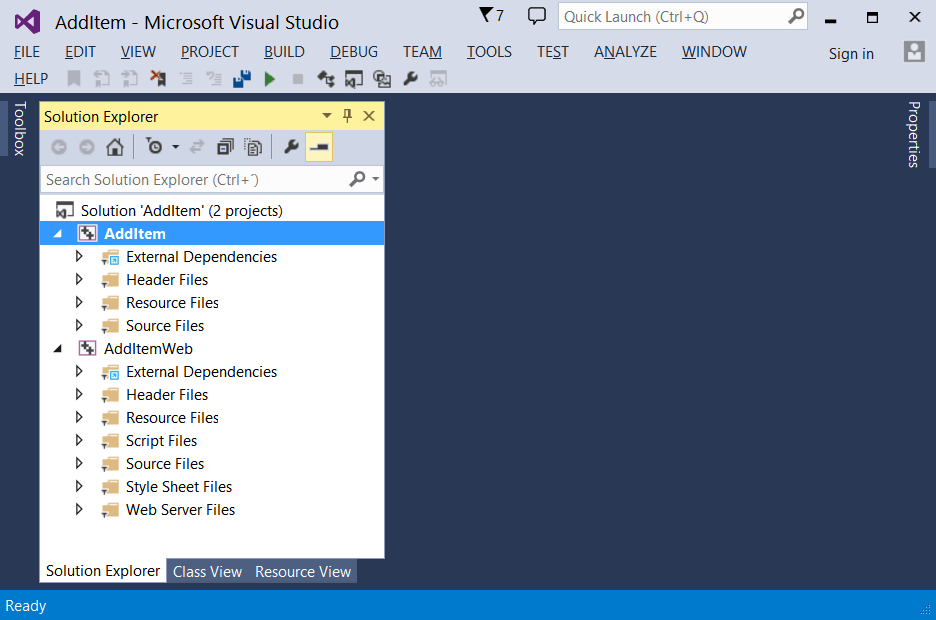
| Use Wintempla to convert the AddItem desktop application to a Dual application. You need to Add a new project (Web Application) to your AddItem project. |
| AddItem.cpp |
| ... void AddItem::Window_Open(Win::Event& e) { //________________________________________________ 1. lvItem: Column Setup lvItem.Cols.Add(0, LVCFMT_LEFT, 200, L"Item name"); lvItem.Cols.Add(1, LVCFMT_LEFT, 120, L"Model"); lvItem.Cols.Add(2, LVCFMT_LEFT, 120, L"Brand"); lvItem.Cols.Add(3, LVCFMT_LEFT, 120, L"Category"); //_______________________________________________ 2. Fill the list view control with the items lvItem.SetRedraw(false); // stop redrawing the control when inserting items AddItemDual::Window_Open(*this, NULL); lvItem.SetRedraw(true); } void AddItem::btInsert_Click(Win::Event& e) { ItemDlg dlg; dlg.BeginDialog(hWnd); FillListView(*this, NULL); } |
| ItemDlg.cpp |
| ... void ItemDlg::Window_Open(Win::Event& e) { ItemDlgDual::Window_Open(*this, NULL); //_______________________________________________ 2. Select default values ddCategory.SelectedIndex = 0; ddBrand.SelectedIndex = 0; } void ItemDlg::btOK_Click(Win::Event& e) { ItemDlgDual::btOK_Click(*this, NULL); } void ItemDlg::btCancel_Click(Win::Event& e) { this->EndDialog(FALSE); } |
| AddItemDual.h |
| #pragma once //_____________________________________________ AddItemDual.h class AddItemDual { public: AddItemDual() { Init(); } ~AddItemDual() { } void FillListView(Sys::IWindow& window, Web::HttpConnector* h); ... }; CODE AddItemDual.cpp #include "stdafx.h" //_____________________________________________ AddItemDual.cpp #include "AddItemDual.h" void AddItemDual::Window_Open(Sys::IWindow& window, Web::HttpConnector* h) { FillListView(window, h); } void AddItemDual::btInsert_Click(Sys::IWindow& window, Web::HttpConnector* h) { } void AddItemDual::FillListView(Sys::IWindow& window, Web::HttpConnector* h) { lvItemD.DeleteAllItems(); Sql::SqlConnection conn; try { //conn.OpenSession(DSN, USERNAME, PASSWORD); //Control Panel>Administrative Tools>Data Sources (ODBC)>Create dsn_myDatabase conn.OpenSession(window, CONNECTION_STRING); conn.ExecuteSelect(L"SELECT item_id, item_descr, model, brand_descr, category_descr FROM vw_item", 100, lvItemD); } catch (Sql::SqlException e) { window.MessageBox(e.GetDescription(), L"Error", MB_OK | MB_ICONERROR); } } |
| Index.cpp |
| ... void Index::Window_Open(Web::HttpConnector& h) { //________________________________________________ 1. lvItem: Column Setup lvItem.Cols.Add(LVCFMT_LEFT, 22, L"Item name"); lvItem.Cols.Add(LVCFMT_LEFT, 20, L"Model"); lvItem.Cols.Add(LVCFMT_LEFT, 20, L"Brand"); lvItem.Cols.Add(LVCFMT_LEFT, 25, L"Category"); lvItem.Height = 30; AddItemDual::Window_Open(*this, &h); } void Index::btInsert_onclick(Web::HttpConnector& h) { //AddItemDual::btInsert_Click(*this, &h); h.NavigateTo(L"ItemPage"); } |
| ItemDlgDual.cpp |
| ... void ItemDlgDual::Window_Open(Sys::IWindow& window, Web::HttpConnector* h) { //________________________________________________ 1. Fill the category drop down list and the brand drop down list Sql::SqlConnection conn; try { //conn.OpenSession(DSN, USERNAME, PASSWORD); //Control Panel>Administrative Tools>Data Sources (ODBC)>Create dsn_myDatabase conn.OpenSession(window, CONNECTION_STRING); conn.ExecuteSelect(L"SELECT category_id, descr FROM category", 100, ddCategoryD); conn.ExecuteSelect(L"SELECT brand_id, descr FROM brand", 100, ddBrandD); } catch (Sql::SqlException e) { window.MessageBox(e.GetDescription(), L"Error", MB_OK | MB_ICONERROR); } } void ItemDlgDual::btOK_Click(Sys::IWindow& window, Web::HttpConnector* h) { //__________________________________________________________ 1. Get category_id LPARAM category_id; if (ddCategoryD.GetSelectedData(category_id) == false) return; //__________________________________________________________ 2. Get brand_id LPARAM brand_id; if (ddBrandD.GetSelectedData(brand_id) == false) return; //__________________________________________________________ 3. Get Name and Model wstring name = tbxNameD.Text; wstring model = tbxModelD.Text; //__________________________________________________________ 4. Validate (you may use regular expressions) if (name.length() <= 2) { tbxNameD.ShowBalloonTip(L"Item Name", L"The item name must contain at least three characters", TTI_ERROR); return; } if (model.length() <= 2) { tbxModelD.ShowBalloonTip(L"Item Model", L"The item model must contain at least three characters", TTI_ERROR); return; } //__________________________________________________________ 5. Create INSERT statement wstring cmd; Sys::Format(cmd, L"INSERT INTO item (descr, model, brand_id, category_id) VALUES('%s', '%s', %d, %d)", name.c_str(), model.c_str(), brand_id, category_id); //__________________________________________________________ 6. Execute INSERT Sql::SqlConnection conn; int rows = 0; try { //conn.OpenSession(DSN, USERNAME, PASSWORD); //Control Panel>Administrative Tools>Data Sources (ODBC)>Create dsn_myDatabase conn.OpenSession(window, CONNECTION_STRING); rows = conn.ExecuteNonQuery(cmd); if (rows!=1) { window.MessageBox(Sys::Convert::ToString(rows), L"Error - inserted rows", MB_OK | MB_ICONERROR); } if (h == NULL) { window.EndDialog(TRUE); } else { h->NavigateTo(L"Index"); } } catch (Sql::SqlException e) { window.MessageBox(e.GetDescription(), L"Error", MB_OK | MB_ICONERROR); } } void ItemDlgDual::btCancel_Click(Sys::IWindow& window, Web::HttpConnector* h) { } |
| ItemPage.cpp |
| ... void ItemPage::Window_Open(Web::HttpConnector& h) { ItemDlgDual::Window_Open(*this, &h); if (h.FirstTime == true) { //_______________________________________________ 2. Select default values ddCategory.SelectedIndex = 0; ddBrand.SelectedIndex = 0; } } void ItemPage::btOK_onclick(Web::HttpConnector& h) { ItemDlgDual::btOK_Click(*this, &h); } void ItemPage::btCancel_onclick(Web::HttpConnector& h) { //ItemDlgDual::btCancel_Click(*this, &h); h.NavigateTo(L"Index"); } |